


The easiest questions are about the actual mailing. There are no restrictions regarding color or size (that I am aware of), though you do have to follow the usual conventions for where you put the addresses, leave room for the postage, etc. You do not have to put your envelope in any sort of protective covering (most MA recipients prefer that the envelope arrive in an 'around the world' state of appearance). You can, of course, slip your MA into a protective covering or a manilla envelope if you want. You do need to go into your post office to have the envelope weighed for the correct postage. Many people send their MA using registered or insured mail, though I haven't (I'm too cheap!). You do need to be careful that you use a good closure system. The prettiest MAs make lovely use of buttons with cording and decorative clasps, but my post office won't accept these as being safe and stick tape all over the poor thing. So I loosely stitch the flap of the envelope closed in a contrasting color that the recipient can easily see and snip through. Margaret did this, too, but I opened hers before I took pictures.
Procedure
To make your own MA, I thought I'd try a photo-tutorial. I happen to have a half-ready envelope stitched for Max, so this is a good excuse to finish it off.
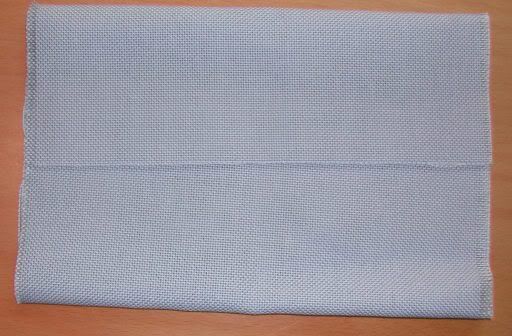
1. First, you need a piece of linen or aida. For a fairly small envelope, 11 inches long by 6 inches wide will allow you the margins for finishing. The envelope I am completing here is stitched on Softana measuring 14 inches long by 9.5 inches wide. (If you use metric, these measurements are 25 x 15 cm and 34 x 23 cm.)
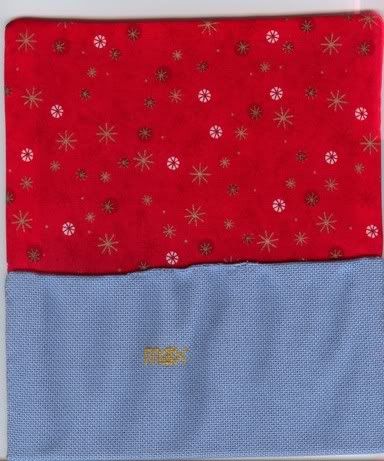
2. Tri-fold your piece of fabric to determine where you'll stitch the address, the main design, closure, etc. This envelope back allows me room to stitch my address on the top flap and the recipient's address below the flap. I will stitch my big design on the other side. I find it very helpful to run pieces of thread along what will become the edges - where the top flap folds over, where the bottom flap folds under, and what the design area is. Remember to leave room for the seams when you sew it all up!
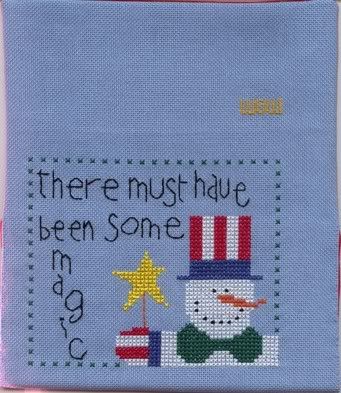
3. Once your design are is established, find a design that fits it. Or you could be really organized and first have your design and then cut your fabric. That's just too orderly for me. LOL!
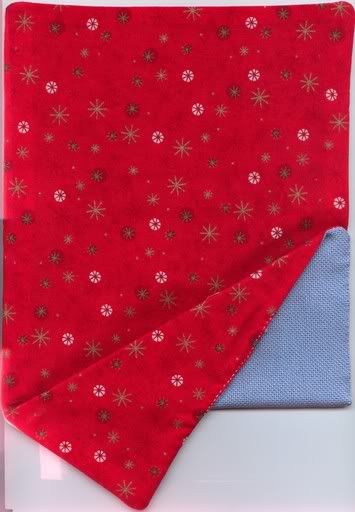
4. Stitch your design. Unfolded, your piece of fabric now looks something like this.
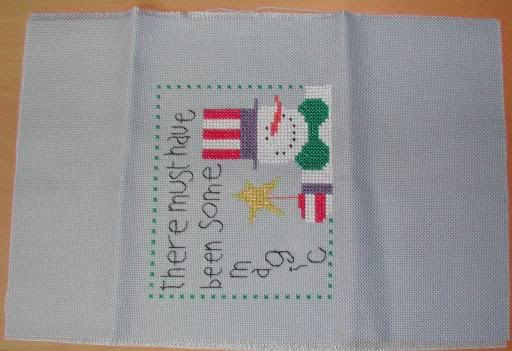
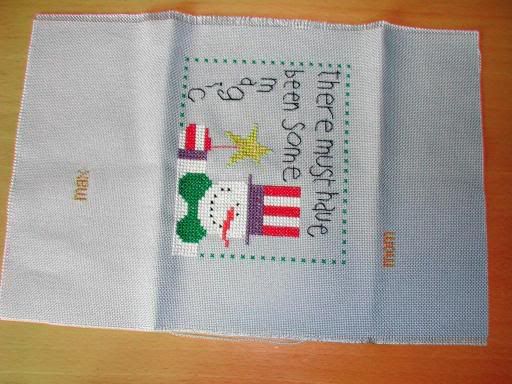
5. Being careful to keep in mind what's the top, stitch your addresses. It is better to use a boring but clear alphabet than a fancy script that is going to give your mail carrier fits. Sketch the address out on graph paper before you start to make sure it is nicely centered. (I never take the time for this, but always wish I had.)It is also good to use a floss that contrasts boldly with your fabric, even if this isn't the prettiest choice of colors. This little critter is going to cause enough confusion as it makes its way through the mail system without being illegible.
6. Pin your envelope to the lining fabric, right sides (the sides with the decoration) together and cut the lining fabric.
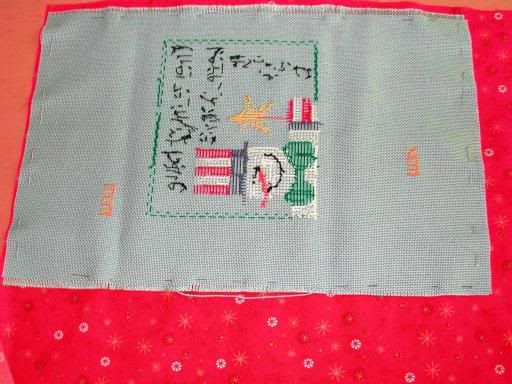
7. You can hand sew the lining and envelope together, but I use my antique machine - when it feels like cooperating! Don't forget to leave an opening through which you'll turn everything inside out (someone who we won't name has done this). I usually stitch with about 1/4 inch seam allowance. When you're finished stitching and the envelope has the decorative sides showing, iron everything again.

8. Stitch the opening closed. I don't know how to stitch invisibly, but for this part, I do try. Note that some methods of closure will require you to leave this opening unstitched until the end. For instance, a loop of cording (to go over a button) would need to be stitched into the opening. See step 10.
9. Now tri-fold your fabric, with the lining material in. Stitch along the sides that make up the envelope, leave the flap free.(I stitch from the bottom of the fold up to where the flap.) Stitch the sides however you want - whip stitched, with beads, whatever strikes your fancy. My camera has now died completely so I'll try to scan the last steps.
10. After the sides are stitched up, you now have your envelope! It may look a bit like a pouch with a flap. The bigger envelopes are especially saggy and you might try a mid-weight fusible interfacing to firm it up a bit. You can now attach your closure of choice. Stitch a snap inside, use Velcro (though one I recieved with stick-on Velcro did not work well, the sticky part of the Velcro didn't stay affixed to the fabric.), stitch a button on and a loop of cording, whatever seems fun to you. Some closures require you to leave that inside-out opening unstitched until after your closure is attached (like a loop of cording), so you may need to skip step 8 until now.
11. To keep your envelope's form, it helps to insert a sturdy card or postcard. It's also nice for the recipient to have some personal note with the MA. If you are enclosing gifts (floss, etc.) I strongly suggest stitching the flap down with some sort of loose basting/whip stitch that the recpient can cut free.
Sorry about the quality/lack of photos, but it is quite a simple process if you give yourself a bit of time with the finishing to avoid silly mistakes (like I made on my first MA. LOL!!)


Barbara, Thank you for your wonderful tutorial! I'm going to have to give this a try sometime as it looks like so much fun. And all those I've seen posted look like they survive the process very well!